V4A-Dolby-MaxxAudio-AIO-Soubd-Mod

Sound Mod: PSZ AIO Sound System. Viper4Android, Dolby Atmos, Maxx Audio Combo Pack!!!

V4A-Dolby-MaxxAudio-AIO-Soubd-Mod
PSoftZone All In One Sound Mod

Hi there, today I’m presenting an awesome sound mod called “PSoftZone All In One Sound Mod”. It a great sound mod for Android device. It’s not an app, it’s a flashable zip & combination of different apps & sound mods like Dolby Atmos, Viper4Android, Max Audio etc. So you don’t need to install of flash different sounds any more. Because it is giving you the scope to use all sound mods at single flash!! And Yes! it is based on A.R.I.S.E Sound System.

PSZ AIO Sound Mod includes Viper4Android, Dolby Atmos, Maxx Audio & other sound libs in a single Flashable zip!!!

Introduction:

  • Mod Name       : PSZ AIO Sound Mod
  • Full Name        : PSoftZone All In One Sound Mod
  • Size                    : 45 MB
  • Developers      : ARISE TeamPranto
  • Included Apps: Dolby Atmos, Maxx Audio, Viper4Android
  • Mod Type         : Flashable Zip (Flash via Custom Recovery)

Requirements:

  • Android 4.1(Jelly Bean) – Android 6.x & Maybe 7.x
  • Minimum 80MB free space in System
  • A Custom recovery installed
  • And Root also..

Features:

  • Built in Viper4Android with pre-installed Super Quality Drivers.
  • Built in Dolby Atmos
  • Maxx Audio from Lenovo K3 Note
  • Sony LDAC Bluetooth Codec
  • Sony Xperia sound libs
  • LeTv Max 2 sound libs & DTS
  • Also has built in some premium music players sound libs. Ex: USB Audio Player Pro, Neutron Music Player, Sony Music DSP, Onkyo HF.
  • Work on almost all devices running 4.x or later.
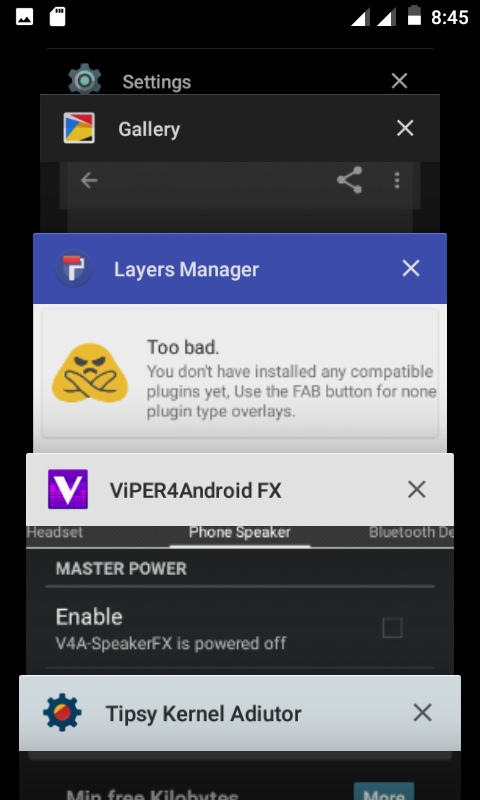
Screenshots:

Installation:

  1. First of all make sure you have 80MB free space in system.
  2. Make a backup of your current rom.
  3. Reboot your phone to recovery mode. (Must use a Custom Recovery)
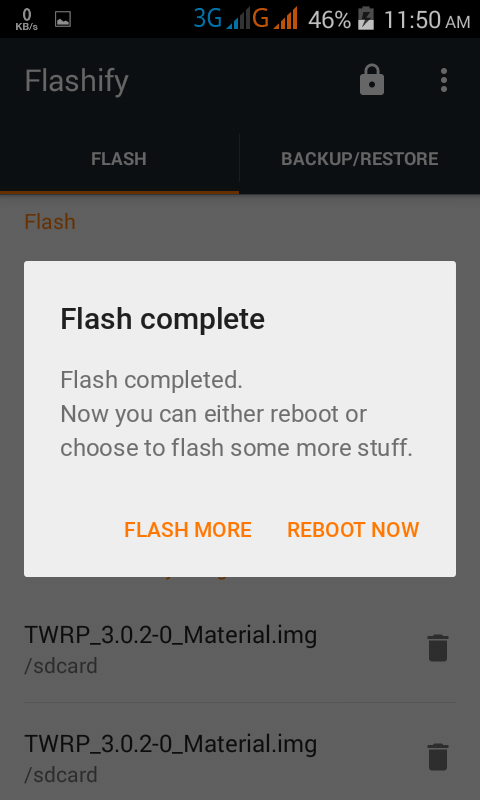
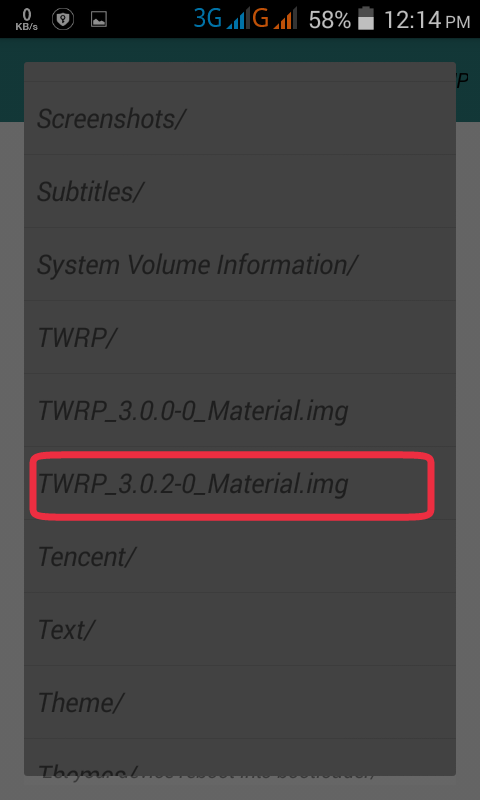
  4. Now install “PSZ-AIO-Sound-Mod.zip
  5. After installation, reboot your phone.
  6. Now enjoy Viper4Android, Dolby Atmos, Maxx Audio at same time!!!
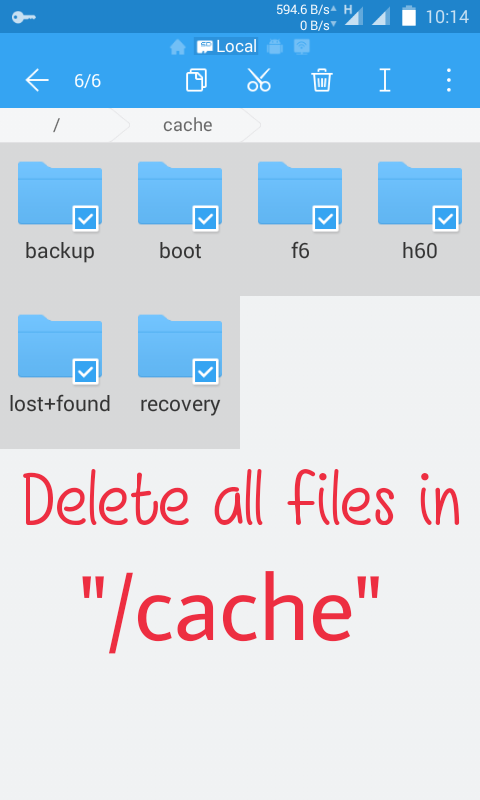
Uninstallation:

  • PSZ AIO Sound Mod replaces system files, so that it can not be uninstalled. For this you have to make a backup of your current rom before flashing PSZ AIO Sound Mod. And when you want to uninstall it, you have to restore your backed up rom. Otherwise you need to flash the full rom/firmware.

Downloads:

PSoftZone on Facebook

Mokee-MT6582-PSoftZone

MOKEE OS Custom Rom For Primo E4 & E4+

Mokee-MT6582-PSoftZone


Rom Details:

  • Name: MOKEE OS(Open Source)
  • Base: CyanogenMod 12.1
  • Android Version: 5.1.1 Lolipop
  • Kernel: 3.4.67
  • Platform: MT6582
  • Device: Walton Primo E4 & E4+
  • Compile: TRT
  • Port: Pranto Kumar Pashi


Requirements:

TWRP 3.0.2 Material Themed Custom Recovery For Primo E4 & E4+

Features & Working:

  • Full stable, No bugs at all
  • All features of CM12.1 & Mokee
  • Camera, 1080p video recorder working (8MP camera lib)
  • Wifi, Bluetooth, Hotspot working
  • Playes HD videos without lags
  • No network drop issue
  • USSD working
  • CM theme engine working
  • And many more other features…

Screenshots:

Installation: Must Follow

  1. Backup your IMEI & current Rom
  2. Go to Recovery
  3. Wipe Data/Factory reset
  4. Install “MokeeOS MT6582 PSoftZone.zip”
  5. Install “Primo E4 & E4+ Combo Patch.zip”
  6. Now reboot system
  7. After first boot, again go to Recovery & Install “Open Gapps.zip”
  8. Now Enjoy…

Downloads: 


Find Us On FaceBook


pussyfap-v4-walton-primo-e4-psoftzone

PussyFap v4 – Best Edition For Walton Primo E4 & E4+

pussyfap-v4-walton-primo-e4-psoftzone

♦Rom Details:
Name: PussyFap
Rom Version: 4.0
Android Version: 4.4.2 KitKat
Karnel Version: 3.4.67
Device: Walton Primo E4 & E4+
Platform: MT6582
Port: Pranto

♦Requirements:
– Must installed any custom recovery. If you do not have that, then please follow these posts.

TWRP 3.0.2 For E4 & E4+
Philz Touch Recovery For E4 & E4+

♦Features & Working:
– Based on Android 4.4.2
– Built in Dolby Atmos
– Font Style Options
– Navigation Bar Options
– Double Tap to Sleep Gesture
– Shake to Clear Ram
– Gestures Anywhere Options
– Ad Blocker
– System App Remover
– Rooted with Superuser
– Dynamic System Bars(Supported All Devices)
– Heads Up Notification
– Debloat Rom for Better Performance
– Playes HD videos without lags

♦Bugs & Not Working:

  • Music force closes sometimes but doesn’t affect the app

♦Screenshots:

♦Installation: Must Follow
– Make sure you have backed up your current ROM & IMEI.
– Now reboot to recovery.
– Wipe /Data & /Cache only. Do not wipe “/System”.
– Now install “PussyFap-V4-PSoftZone.zip”.
– Then install “Primo E4 PussyFap v4 Patch.zip’.
– Now reboot & enjoy!!

♦Downloads:

♦♦PSoftZone On FaceBook♦♦

Xposed-Framework-installer-for-lolipop-marshmallow-psoftzone

How To Use Xposed Framework On Lolipop & Marshmallow Devices

Xposed-Framework-installer-for-lolipop-marshmallow-psoftzone


Hello guys, today I came with a most wanted tutorial. We know that Rovo89‘s Xposed can not be installed on android 5.x & 6.x devices with xposed installer app. But we can install xposed framework via Recovery. There is some flashable zip provided by Rovo89 on xda for Lolipop & Marshmallow devices. No I will teach you how to use this flashable zips. So after reading this post you will able to,

Install Xposed Framework On Your Lolipop (5.0.x, 5.1.x) & Marshmallow (6.0.x)  Devices.


Requirements:

  • Rooted Phone
  • A Custom Recovery Installed
  • BusyBox installed

[Tut] How To Install BusyBox

[Tut] How To Make/Port Philz Touch Recovery For Mediatek (MTK) Device

How To:

– First you have to download & install Xposed Installer 3.0.apk. Link is given in download section.

– Now you have to download correct Xposed**.zip. (Link is given in download section). First choose your SDK version. [Choose SDK 21 for Android 5.0.x lolipop, SDK 22 for Android 5.1.x lolipop, SDK 23 for Android 6.0.x marshmallow

xposed-framework-lolipop-marshmallow-psoftzone-01

– Now choose your CPU Architect. (You can find out your CPU Architect using CPUz.apk)

xposed-framework-lolipop-marshmallow-psoftzone-02

– Now you have to choose the version of Xposed you want to download. I suggest you to download the latest one. Here the small .asc files are GPG signatures of the .zip files. You do not need to download the .asc files. Download only the .zip file & place the zip file in SDcard.

xposed-framework-lolipop-marshmallow-psoftzone-0

– Go to recovery mode & install Xposed**.zip. Now reboot your phone. It may take  a few minutes.

– After your phone boots open Xposed installer app from your app drawer. You should see the ui like this. If you don’t, please re-follow the whole process.

xposed-framework-lolipop-marshmallow-psoftzone-06

TroubleShooting

  • If your device gets a bootloop, you need to uninstall the xopsed framework. For this download the unstaller**.zip accorading to you cpu from the download link of xposed & flash it via recovery. Now your device should boot normaly.


Downloads:


PSoftZone on Facebook

MiUi-6-Walton-Primo-e4-mt6582-PSoftZone-02

MIUI 6 v5.5.1 For Walton Primo E4 & E4+

 MiUi 6 Custom Rom For Walton Primo E4 & E4+

MiUi-6-Walton-Primo-e4-mt6582-PSoftZone-02
MiUi 6 For Primo E4 & E4+

Hello Primo E4 & E4+ users, today I’m sharing an awesome rom. Yes its MiUi!! I have ported many MiUi Roms, like MiUi 7, MiUi 8 for Primo E4 but none of them is usable. All of them are laggy, slow etc. At last I ported MiUi 6 v5.5.1 for Primo E4 & its works fine. It is not laggy as MiUi 7 or MiUi 8. You can choose it for daily use! But it has only one problem, you can use 3G in 1st sim.

After all its a good stylish Rom. So that I decide to share it. Let’s see details…

♦Rom Details:
Name: MIUI 6
Rom Version: 6 (v5.5.1)
Android Version: 4.4.2 KitKat
Kernel Version: 3.4.67
Device: Walton Primo E4 & E4+
Platform: MT6582
Port: Pranto Kumar Pashi

♦Requirements:
– Must installed “TWRP” or “Philz” recovery. If you do not have that, then please follow these post. TWRP is recommended.

TWRP 3.0.2 Custom Recovery

♦Features & Working:
– All MIUI features.
– MiUi theme store. All paid theme for free. (enable modules from xposed)
– Dual Sim (only 1st sim 3g)
– Build in xposed installer
– No laggs
– Good ram management
– SD card is primary storage
– AdAway ad blocker
– Camera & video recorder working
– Wifi, Bluetooth, Hotspot working
– Many more…

♦Limitations:
– Only first sim 3G
– Bad battery life

Tell me if you face any bug.

♦Screenshots:

        More ScreenShots are available Here

♦Installation:
– First go to recovery mode.
– Wipe data & Cache
– Install MiUi 6 (5.5.1).zip
– Install Patch MiUi 6.zip
– Install SuperSU.zip
– Reboot your phone.

♦Pro Tips: (How to get paid themes for free?)
– Go to Settings> Additional Settings> Modules
– Now you will see Xposed Installer ui. Open Modules.
– Mark all the modules.
– Now reboot your phone.
– Enjoy paid MiUi themes for free!!

♦Downloads:


PSoftZone on FaceBook

TipsyOS-MT6582-Marshmallow-PSoftZone

[AOSP 6.0.1] TipsyOS Custom Rom For Primo E4 & E4+ & Other MT6582

TipsyOS For MT6582

TipsyOS-MT6582-Marshmallow-PSoftZone

After long time again I came with a great Rom for Primo E4 & E4+ users. Its a cool rom. TipsyOS is based on AOSP 6.0.1 Marshmallow. It is diffrent from CM (CyanogenMod) Roms. Hope you will get a new experience!!

I want to thank Ajit for compiling this Rom for MT6582. I’ve tried to make this rom fully stable for Primo E4 & E4+. But if you find any bugs please tell me. I’ll try to fix them.

♦Rom Details:
Name: TipsyOS
Rom Version: 4.0
Based On: AOSP 6.0.1
Android Version: 6.0.1 Marshmallow
Karnel Version: 3.4.67
Device: Walton Primo E4 & E4+
Platform: MT6582
Build: Ajit Guraya
Port: Pranto Kumar Pashi

♦Requirements:
– Must installed “TWRP” or “Philz” recovery. If you do not have that, then please follow these posts.

TWRP 3.0.2 For E4 & E4+
Philz Touch Recovery For E4 & E4+

♦Features & Working:
– Based on AOSP 6.0.1
– SD card is primary storage
– Camera, 1080p video recorder working (8MP camera lib)
– Sound recorder working
– FM radio working
– USSD working
– AOSP layers
– AdAway ad blocker
– Offline charge working
– Dual Sim
– Wifi, Bluetooth, Hotspot working
– No network drop issue
– Good battery life
– 720p videos in youtube
– Playes HD videos without lags

♦Bugs:
– VPN
– GPS

♦Screenshots:

tipsyos-primo-e4-mt6582-marshmallow-01tipsyos-primo-e4-mt6582-marshmallow-02tipsyos-primo-e4-mt6582-marshmallow-04tipsyos-primo-e4-mt6582-marshmallow-05tipsyos-primo-e4-mt6582-marshmallow-06tipsyos-primo-e4-mt6582-marshmallow-07


♦Installation: Must Follow
– Make sure you have backed up your current ROM & IMEI.
– Now reboot to recovery.
– Wipe /Data & /Cache only. Do not wipe /System.
– Now install TipsyOS.zip.
– Then install TipsyOS Combo Patch.zip.
– Install Gapps.
– Now reboot system.
– After first boot, again go to recovery & install SuperSU.zip
– Now reboot & enjoy!!

♦Downloads:
– TipsyOS For Primo E4 & E4+

Troubleshooting:
If data connection not works then delete or remove nvram folder from /data & reboot your phone. Now data will turn on!!

♦Credit & Thanks:
– Fire855
– Ferhung
– Hyperion70
– Ayat Ridoy
– Ajit@mtkroms
– Pranto Kumar Pashi

♦♦PSoftZone On FaceBook♦♦

TWRP-3.0.2-Custom-Recovery-For-Primo-RM2

TWRP 3.0.2 Custom Recovery For Walton Primo RM2

TWRP 3.0.2 Custom Recovery For Walton Primo RM2

TWRP-3.0.2-Custom-Recovery-For-Primo-RM2

♦Recovery Details:
Name: Team Win Recovery Project (TWRP) Recovery
Version: 3.0.2-0
Theme: Material theme
Platform: MT6582 KK. Can be ported to all MTK Device
Device: Walton Primo RM2
Developer: TeamWin
Ported By: Pranto

♦Features:
– Latest build
– Its just like an app. You won’t feel that you are in recovery mode!!
– All optins working
– Support installation img files
– No MD5 mismatch
– USB mounting on PC
– Can backup NVRAM, pro_info etc.
– Can mount all partitions, bla bla..

Changelog:
– Support new CM 13.0 pattern encryption
– Fix slow flashing issue due to modprobe
– Libtar updated to latest upstream and fixes
– Reboot option after zip install complete
– Completely new theme
– True Terminal Emulator
– Language translation
– Flashing of sparse images
– Adopted storage support for select devices
– Reworked graphics to bring us more up to date with AOSP
– Update exfat, exfat fuse, dosfstools
– A huge laundry list of other minor fixes and tweaks

♦Screenshots:
image
image

image

image

image
image

♦Installation:
See this post: TWRP Installation Tutorial.

Troubleshooting:
If you want to install CM12.1 or any other CM Roms, then follow this steps:
– First wipe Only “/Cache” & “/Data”. Do not wipe “/System”.
– Now install Roms, Patchs.
– Now wipe “/cache” & “dalvik”.
– Now reboot.

♦Downloads:
– TWRP 3.0.2 For Primo RM2

   ♦♦PSoftZone  On FaceBook ♦♦

Installing-recovery-boot-img-PSoftZone

[Guide] How To Flash or Install Custom Recovery & Kernel or Boot Using Flashify or Rashr


How to install custom recovery via Flashify or Rashr

Installing-recovery-boot-img-PSoftZone
Kernel & Recovery Flashing – PSoftZone

Recovery.img & Boot.img Flashing Via Flashify or Rashr


Requirments:

  • Rooted Mobile
  • BusyBox Installed
  • Recovery.img or Boot.img to flash.

Also Read:

How To Root & UnRoot Android Phone Using KingRoot

[Tut] How To Install BusyBox

Installition:

I will share two methods to flash img. One using Flashify & other using Rashr.Let’s start.


Using Flashify:

– Download Flashify & install it.

– Now open Flashify & give it root permission.

– Choose Recovery image to flash recovery & choose Boot image to flash boot.

Custom-Recovery-Flashing-Flashify-01

– You will see a popup window. Select Choose a file.

Custom-Recovery-Flashing-Flashify-02

– Now choose the img file you want to flash.

Custom-Recovery-Flashing-Flashify-03

– Flashify will ask you to confirm, just select YUP!.

Custom-Recovery-Flashing-Flashify-04

– It will flash the img. Wait untill its compleate.

Custom-Recovery-Flashing-Flashify-05

– Now from this popup choose REBOOT NOW.

Custom-Recovery-Flashing-Flashify-06

– And its done!!


Using Rashr:

– Download & install Rashr.

– Open it & give it root access.

– Select Recovery from storage to flash recovery & select Kernel from storage to flash boot.

Custom-Recovery-Flashing-Rashr-01

– Choose the img file.

Custom-Recovery-Flashing-Rashr-02

– It will show you a warning, just select Yes.

Custom-Recovery-Flashing-Rashr-03

– Now your file will install.

Custom-Recovery-Flashing-Rashr-05

– Rashr will ask if you want to reboot, select Yes.

Custom-Recovery-Flashing-Rashr-06

– Done!!


Warning:

  • Do not flast wrong img file, otherwise your device may brick!!


Downloads:

PSoftZone On Facebook

APKTool Mobile Setup Guide

[Tut] [Guide] How To Setup APKTOOL Mobile.

APKTool Mobile Setup Guide
APK Tool Setup Guide

Requirements:
– ApkTool 4.4.1 (link is given blow)
– Rooted device
– BusyBox installed
– X-plore.

Setup ApkTool:

– Open Apktool4.4_armhf.zip using X-plore.

– Extract Apktool folder to your sdcard.

– Open Apktool folder from sdcard & install apktool 4.4 .apk

– Open Apktool from your app drawer. Give it root access.

– No go to System/framework folder & click on Framework-res.apk & select Import as framework. Wait for successful message. Now do the same for mediatek-res.apk

– Again open System/priv-app (or System/app; for JB), click on SystemUI.apk & select Import as framework. Wait till successful message.

– Done 🙂

Downloads:

PSoftZone on FaceBook

MTK-Recovery-Porting-Guide

MTK Recovery Porting: Port Any Custom Recovery To Any MTK Device With Mobile. No Need PC!!

MTK-Recovery-Porting-Guide
Recovery Porting Guide – PSoftZone

Hello guys, today I’ll tell you How to port a custom recovery on your MTK mobile. You can port TWRP, CWM, CTR, Philz, COT recovery using this method.

Requriements:

  • Rooted Device
  • BusyBox Installed
  • APKTool Installed
  • Good Mind

Also Read:

APKTool Setup Guide


Step 1: (Preparing)
Open ES file explorer give it root permission. Go to “/cache” & delete all files/folders in it.

MTK-Custom-Recovery-Porting-1


Now create 3 new folders as the screenshot. (Don’t use space in folders names)

MTK-Custom-Recovery-Porting-2


Now copy Stok boot.img to “Stok_boot“;
Stok recovery to “Stok_recovery“;
Port recovery to “Port_recovery“.

MTK-Custom-Recovery-Porting-3


Now rename boot to “boot.img“, rename stok recovery to “recovery.img” & rename port recovery to “recovery.img
(if it already in this name than you need not change the name)

MTK-Custom-Recovery-Porting-4


Step 2: (Decompiling)
Open apktool & long press on “cache“. You will see a popup like this. Than choose “get access permission“.

MTK-Custom-Recovery-Porting-5

Now open “cache” folder & do same for “stok_boot“, stok_recovery& “port_recovery“.

Open “stok_boot” folder & tap on “boot.img“. You will see a popup menu. Choose “expack-mt65xx

MTK-Custom-Recovery-Porting-6


Your boot will decompile in few seconds. Wait till it’s complete.

MTK-Custom-Recovery-Porting-7


Now open “stok_recovery” & “port_recovery” one by one & decompile them same as “boot.img“.

All of the folders look like this.

MTK-Custom-Recovery-Porting-8


Step 3: (File Replacing)
Open “stok_recovery“. Copy “kernel” & paste/replace it in “port_recovery“.

MTK-Custom-Recovery-Porting-9


Now open “stok_recovery/ramdisk” & copy these files & paste them to “port_recovery/ramdisk“.

– meta_init.project.rc
– meta_init.rc
– meta_init.modem.rc
– ueventd.rc
– ueventd.goldfish.rc
– fstab
– fstab.goldfish

(If you couldn’t find any file in stok recovery, find it in stok boot. Again you couldn’t find it in stok boot, then leave/skip it)

Now open “stok_recovery/ramdisk/etc” & copy “recovery.fstab“. Again open “port_recovery/ramdisk/etc” & paste the file here. ***

Step 4: (recompiling)
Open Apktool & gain access permission of /cache“, “Port_Recovery“, & “Port_Recovery/ramdisk. (See Step 2)

Now tap on “ramdisk” of port_recovery & you will see a popup menu like this. Select repack-mt65xx

mtk-custom-recovery-porting-10


Your ported recovery will recompiled as new.img.

Copy this new.img file to sdcard & flash it via Flashify or Rashr.

Step 5: (bug fixing)
Reboot to recovery & search for bugs/problems.

***If you see a massage like this can’t mount sdcard or can’t mount xxx then follow this steps.

Start work from first & in “step 4don’t replace recovery.fstab“, edit the file with text editor.

See this post & find out your phone’s mount point. Now replace the mount poins of recovery.fstab with yours.

mtk-custom-recovery-porting-5

Now repack the port recovery again & test it. Hope it is working correctly. 😀

Join us on FaceBook